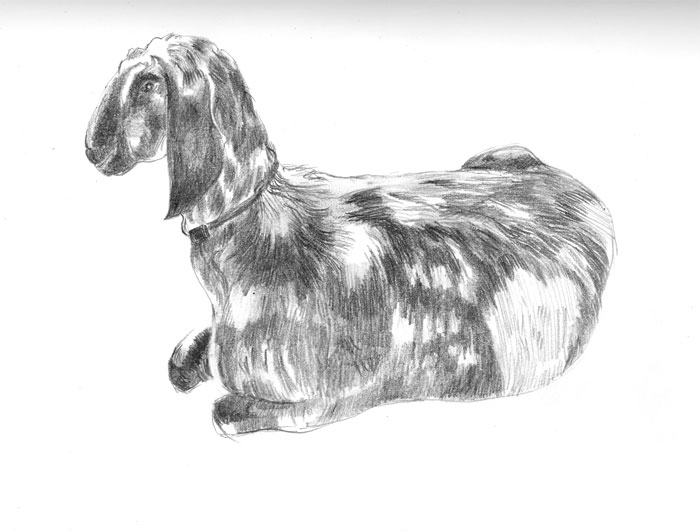
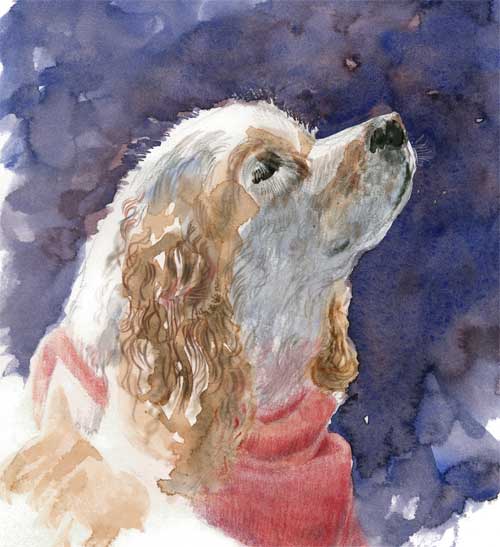
Spotted Nubian – Illo Friday
Click to enlarge
I got busy this week and missed the chance to do something for Illustration Friday. So here’s something done earlier this year that wasn’t used for any previous project …
If you’re a regular reader, you know that I very seldom do any graphite drawing. I don’t have any negative feelings about it. In fact, I love the beautiful halftones that some of my artist friends like Detlef and Felicity so skillfully achieve. For some reason, perhaps negative experiences drawing with a pencil when I was a child, I just don’t gravitate to it. So today, as part of my ongoing animal series I decided to do something radical and to draw this spotted Nubian goat in graphite instead of ink or paint. The paper was not particuarly smooth or fine, much to my regret. I used 2B, 6B and 8B pencils, a kneaded eraser and a tortillon here and there.
(Edited to add: The paper size was 8 1/2 x 11 – for some idea of scale. K.)
In reality the goat is colored burnt sienna, deep burnt umber, black and white. Maybe I’ll try her in watercolor next. After I finish cleaning my refrigerator, that is.
Coffee at The Alcove
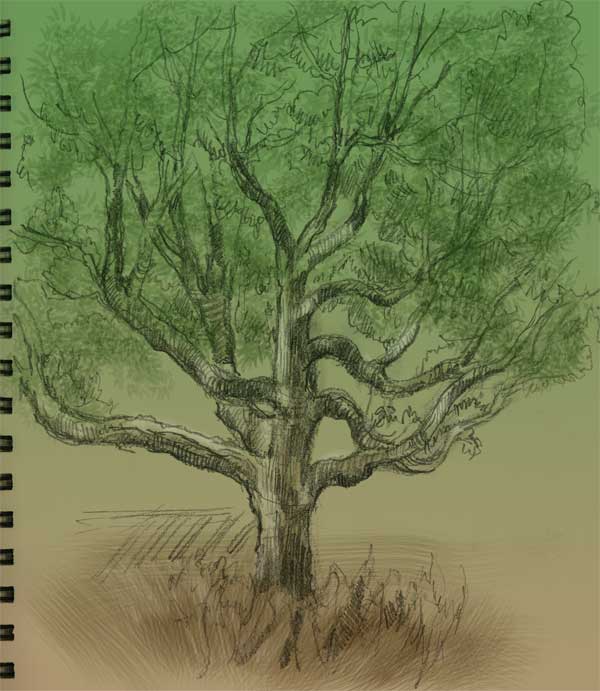
What a wonderful day … we started off in the LA Flower Mart at 7 am for a tour with a Descanso Gardens floral arrangement expert (more on that later) … then brunch at Operetta, a French cafe at the Flower Mart … then over to Barnsdall Park to see a show of fine art by Otis art college graduates (a show which ends tomorrow) … then a brief stop at an art supply store which my dear husband called to my attention, ending up at a charming coffee house called The Alcove on Hillhurst, near the Greek Theater, where we sipped cappucinos and I drew this courtyard tree. I drew a few people also but those will have to wait for another scanning session. Because I hadn’t intended to paint today, I took a simple sketchbook with eh paper for note taking and pencil drawing, so the color here had to be added digitally after the drawing was scanned. A 4B pencil was used for the sketching part.
I wish I knew the name of this tree, I’ll have to look it up in the Sunset garden book. Rough striated bark, grayish brown trunk and limbs, very “ordinary” looking leaves, oval, pointed, smooth edges. You see them all over So. Cal. It appears to be a deciduous tree as the leaves look new, bright green and on the small side. This is going to bug me until I figure it out, y’know?
Edited to add
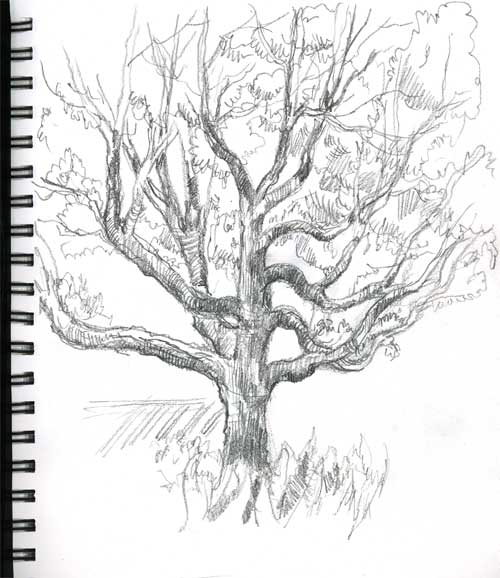
The raw scan out of the sketchbook

I’ve created a grad from green to brown, pulled back the opacity to 50%, and set the grad to multiply

I made a composite of the previous layers and put it on a fresh layer. Then I added new layers and painted some foliage where it made sense. There are three layers of leaves, in varying opacity and color, to suggest volume and depth. I also painted a little color on the trunk.
The tree was a 15-20 min. sketch, the time it took for my husband to stand in line to get coffees while I claimed a table in the crowded courtyard. Photoshopping took about another 10 minutes.
I made the conscious decision not to fit all the tree on the page but to concentrate on the parts that interested me the most, the sinuous trunk and limbs and the textured bark.
I hope you found these additional “work in progress stages” parts interesting
Hat trick
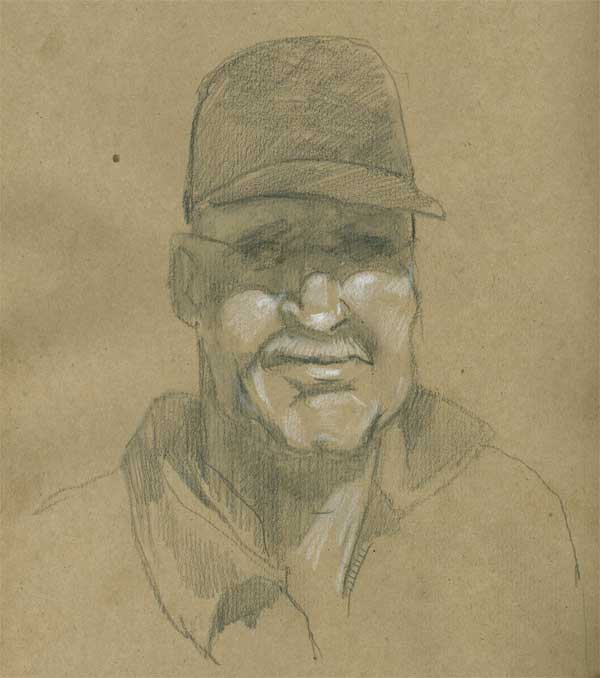
I’ve been talking to some of my art friends about going to a life drawing session and they made some very good recommendations about using materials I’m familiar with. Usually I draw with either ink or watercolor, unless I’m doing something digital. But neither of those seems well suited to a life drawing class. I think that graphite or charcoal would be best, until I can get around to using paint, but that may take some practice. So I’m going to do some exploring with different media before I attend that first session. I rather like the look and feel of toned paper – it seems a bit easier to create dimension than building it all up with the graphite. I’d really love to do drawings with brush pen, and I guess there’s no reason I couldn’t bring a few different things to try.
Earlier today I saw a neat pencil drawing on toned paper, and I had some “bogus rough sketch” paper on hand to experiment with. I drew this using a 4B water soluble Derwent pencil (then I added some water to slosh it around a bit) and finished up with Prismacolor white pencil and some 4B Derwent graphite pencil. I think I’ll try some figures, too, just to see how it goes. I recall seeing some fantastic figure drawing on toned paper in Drawing magazine … around here somewhere … hmmm …
Oh and UCLA beat Alabama, onward to the Sweet Sixteen. Go Bruins.
Another sketchcrawl page
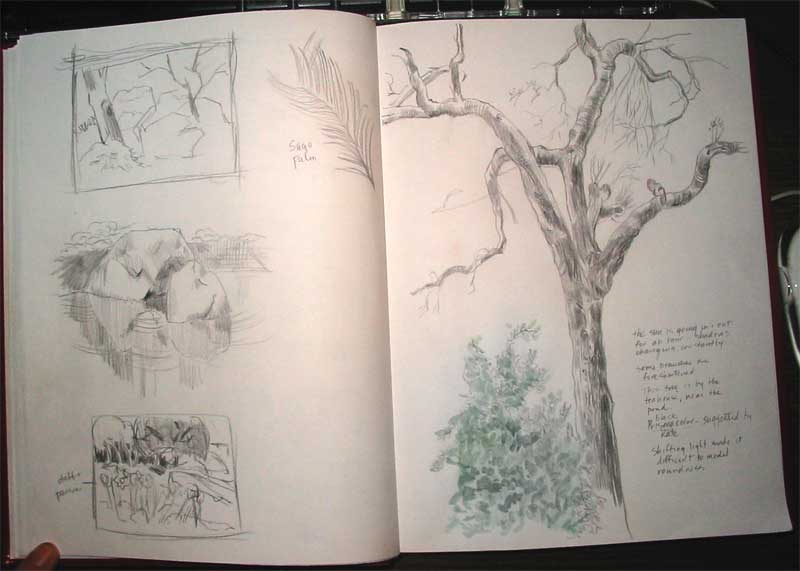
My workbook is evolving, and so am I. Sometimes the mood strikes me to do compositional and value sketches; other times I might be captivated by the texture of a rock, carefully observing the nature of reflections. On Saturday, while hiding out from the sprinkling of rain under the teahouse roof, I settled in to do a long, slow drawing of a California Live Oak. The biggest challenge was trying to describe the volume of the limbs when the light kept changing (like the camellia painting I posted two days ago.) Still, it was a satisfying sketching session and I felt like I got to know this tree a little better.
Too big to fit under my scanner, this 9 x 12 Watson Guptill sketchbook is a good size for trees and big objects.
Sketches are made by fools like me

It’s startling to me at times how I can get so caught up in what I’m doing and ignore the obvious.
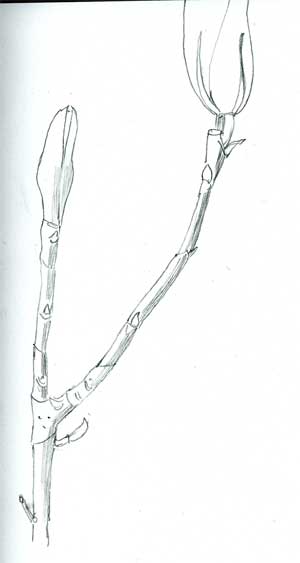
Today I spent some time at Descanso Gardens with my husband, enjoying the beauty of a spring (Valentine’s) day, and I took my time doing a very detailed line drawing of a magnolia twig. As I peered at it intently, something “clicked” and I realized one of the purposes of botanical drawing. When you observe something very closely – and I mean down to the 1/16 of an inch closely, you start to understand what the plant does. You begin to sense which way the twig will bend even before it does. You know where the leaf will come out of an axil, and what side it will be on. You begin to think, perhaps a little bit, like a plant. OK, that’s too new age, scratch that. You know what I mean. You begin to understand the plant intimately, becoming lost in its anatomy, its function and its beauty.
So, as I was fixated on this small twig, working slowly and methodically, I lost sight of the larger plant patterns that shared the same white space: the bare winter bones of the magnolia overhead, the tumescent buds, the rhythm of line and shape, the lost and found edges, the positive and negative spaces. While I was trying to capture nature with my pencil, Nature was impishy doing her own dance with effortless grace, as though to taunt me. But perhaps to lead me on, to keep practicing and to keep looking. I bow to you, Madame Magnolia. You win. Sketches are made by fools like me, but only God can use light to paint a tree.
My artworkbooks
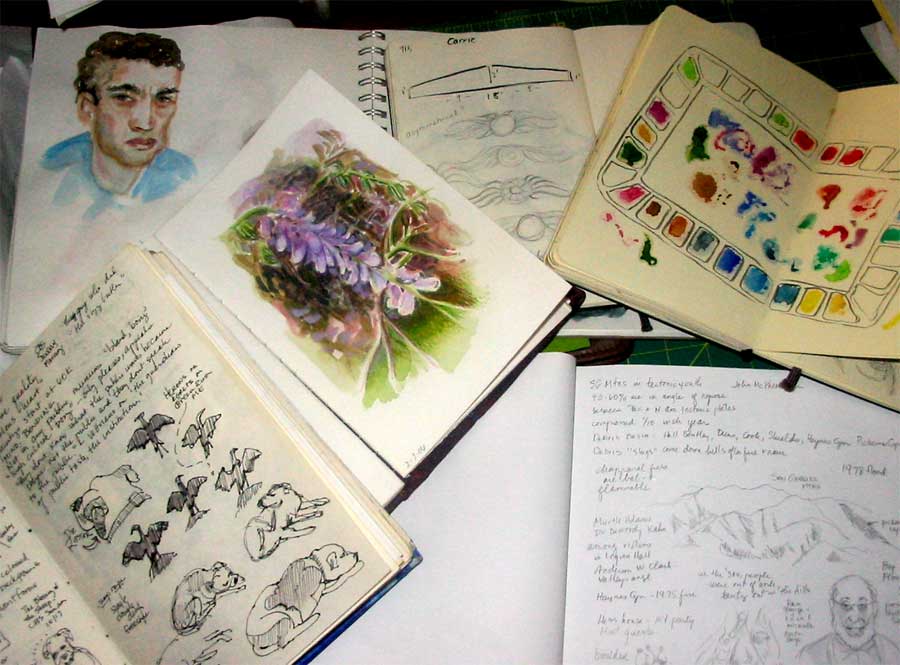
As you can see, I use my journals for a lot of different purposes, not only for sketching pleasure. As I’ve committed myself to doing more painting this year, I find that I’m reaching for it more and more as a practical workbook, not a chronological diary of my days. In fact, I have numerous workbooks with different paper in different sizes. I keep notes of ideas for paintings, I try out color mixtures. I paste in swatches of different kinds of paper and practice different drawing techniques. I work out designs for soft block carving. I carry it with me to museums and make notes about the artists. I even print out and paste in my sketches and paintings done in Photoshop or Painter.
This is my portable personal encyclopedia free of rules and concern about outcomes. The disastrous pages are as valuable as the “good” ones but none of them gets torn out and thrown away. It’s not an artists book destined to look pretty on its own. It’s a workbook – raw, spontaneous and full of scribbles and wrong turns. It’s where I map my “Creative Journey.”
Do you keep an art workbook for experiments and testing paint and such? Write and tell me about it.
karen@karenwinters.com
Gung Hay Fat Choy
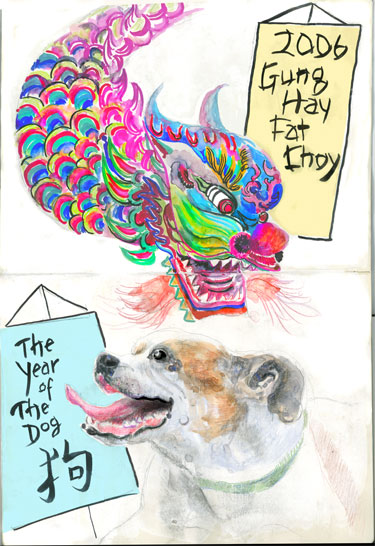
Ripley wishes you a Happy (Chinese lunar) New Year, it’s the year of the dog.
Which is pretty much every year, around here.
My friend Armand Frasco asked me if I might be doing a drawing in my Moleskine for the annual event and I told him that I most likely would. So if you haven’t been over to Moleskinerie today, you should take a look at his China links.
Drawing details:
This was drawn and painted in my Cahier-sized Moleskine, which I mentioned a few days ago. So this drawing is actually 15″ x 10″. I used watercolor Tombow markers for the details on the dragon to save the time of using a small brush. Ripley was painted using my regular tube paints, plus some colored pencils. I added the banners after the dragons using my brush pen, but then looked at it and realized that white banners looked rather bland. At that point there was no choice but to add the color in Photoshop after scanning, or I would have smeared the ink.
Dogginess
I know, I said I was going to do something botanical. And then I went and painted something dogical.
Just don’t tell Ripley that I drew someone else. She will be so jealous.
If I go to a friend’s house and play with their dog she is ALL OVER me with questions when I come home.
Who were you with? What did he look like (yes, dogs know if it was a he or a she)
Did you give him a treat? Did you bring one for me?
Tech stuff:
Watercolor and colored pencil (both watersoluble kind and waxy kind) on Stonehenge paper. The underlying watercolor was painted with a squirrel mop. Some Photoshopping to clean up ragged edges and correct color and values.
I guess I better not leave that squirrel mop within reach of you-know-who or I’ll have to go looking for it in the doghouse.
Blue Hat
I’ve been reading a book this week called Mastering Glazing Techniques in Watercolor (Rankin) which has been affecting my thinking about other kinds of painting. Perhaps you’ve seen a watercolor painting in which the colors seemed to glow from within, or one that had an ethereal feeling to it. How do they do that? The author says that effect can be achieved by using thin layers of transparent color over white paper and using glazes in the right order and of the right value. The author is particularly fond of glazing with Winsor Blue, Winsor red and aureolin yellow (or new gamboge.) Although watercolor painting and digital painting use completely different processes to achieve different hues (one subtractive, with pigment and one additive, with light) I thought it would be interesting to try ‘glazing’ in Photoshop by building up the color on multiple layers. This was just a quick experimental sketch on a piece of scrap paper, scanned and then painted, to see how it would work.
Cuecard man

Last week we made some cue cards for on-camera talent and brought them back with us when the project was over. I was about to throw them out when I realized that the back side could still be used for drawing practice. So I did.
Those blue specks showing through aren’t the paper texture … they’re the bleed-thru of the Sharpie on the other side.
I kind of like the effect, actually.